Tuesday, December 10, 2013

Baked Honey Sriracha Chicken Tenders

Hi everybody.  I'm sorry I've been absent lately.  Alex has been going through a 5 WEEK "Wonder Week" and it's been challenging to say the least.  Add to that the fact that I think he's sensitive to dairy and now we have food challenges that make menu planning even harder.  No more milk, cream, yogurt, ice cream, froyo, or my beloved cheeses :(.  The things we do for our babies.  Am I right?

This is a recipe that's a total keeper AND Alex-friendly!  Who knew that something so simple could taste so good?  It's spicy and sweet with a wonderful crunch.  And get this.  ZERO oil!  The secret to achieving this is by using light, airy panko bread crumbs and baking on a wire rack so that both sides get nice and crisp.

We made them last night and I literally had to make a quick blog post to share with you all.  That's how much we loved this meal!  I apologize for the horrible lighting in the photo but that's what happens when you eat in the dark.  Boo Winter!

Baked Honey Sriracha Chicken Tenders


Ingredients
  • 1/4 cup honey
  • 1/4 cup Sriracha hot chili sauce
  • 14 oz uncooked chicken tenders without breading (or use boneless skinless chicken breast and slice into tender-sized pieces)
  • 1 cup Panko bread crumbs

Directions
  1. Preheat oven to 400F.  Place a wire baking rack on a large cookie sheet and spray with cooking spray.
  2. In a small bowl or large ziplock bag, mix together honey and Sriracha sauce.  Add chicken tenders and toss or squish to coat.
  3. Add bread crumbs in a separate large ziplock bag.  Transfer chicken tenders into bag.  Seal and shake to coat.  Place chicken on wire rack.
  4. Bake for 15 to 20 minutes, until chicken is no longer pink in center and bread crumbs are golden brown.  If desired, serve with additional honey Sriracha sauce for dipping.
Source: Barely modified from Betty Crocker

Monday, November 18, 2013

SRC: Pumpkin Pie Yogurt Parfaits

I've got something delicious and nutritious for this month's Secret Recipe Club!  I was assigned Serena and Deanna's blog, Teaspoon of Spice.  They are both registered dietitians so I was excited to see what healthy yet tasty recipes they had on their blog.  The pictures made everything look so delicious!  In fact, though I had not visited their blog before my assignment I realized I had seen some of these pictures on pinterest and even re-pinned them myself.  That's how you know you've made it big in the blog world is when people find your photos to be so beautiful that they must collect them.  Speaking of pinning recipes, did you know you can now hover over my pictures to pin them?  So easy!

It didn't take me long to decide on a recipe since I'm still working through my 16 cups of pumpkin puree and this one was staring at me on the homepage.  However, I'm not much of a gingersnap fan and wanted to keep this really light and fluffy.  Easy enough because I used graham crackers instead of gingersnaps and just sprayed some whip cream in place of the cheesecake layers.  If you'd rather use the cheesecake layer (which I'll admit, does sound wonderful!), checkout the original recipe linked below in the source.

It has all the flavor of a pumpkin pie with a light, silky texture making it the perfect easy, no-bake dessert to impress your Thanksgiving guests.  Heck, I would even eat this one for breakfast if I added some crumbled granola or maybe some nuts.  Since it's made with 0% fat Greek yogurt, it's practically sinless!

One Year Ago: Savory BBQ Pulled Pork Cinnamon Roll and Taco Dip
Two Years Ago: Roast Beef with Onion Gravy
Three Years Ago: Peanut Butter Fudge Cheesecake
Four Years Ago: Sweet Potato Souffle and Peanut Butter Cup Brownies

Pumpkin Pie Yogurt Parfaits


Yields: 6 servings

Ingredients
  • 15 oz fresh or canned pumpkin puree (not pumpkin pie filling) 
  • 1/2 cup brown sugar 
  • 1 teaspoon ground cinnamon 
  • 1/2 teaspoon ginger 
  • 1/4 teaspoon freshly grated nutmeg 
  • 2 cups nonfat Greek yogurt
  • whipped cream or Cool Whip
  • 6 graham crackers
Directions
  1. In a large bowl, stir together pumpkin puree, brown sugar, cinnamon, ginger, nutmeg, and yogurt.
  2. Place cookies in a ziplock bag.  Crush with a rolling pin until you have crumbles.
  3. Starting with the yogurt on the bottom, divide pumpkin yogurt, whipped cream, and graham cracker crumbs into six tall serving glasses making however may layers you want.  Refrigerate until serving.
Source: Modified from Deanna Segrave-Daly, RD of Teaspoon of Spice

Monday, November 11, 2013

Apple, Brie, and Sausage Pizza on a Pumpkin Crust

Have you ever had a moment where you looked at a recipe and thought "hmmm...this is interesting...different and could it *really* work?".  This was one of those recipes to me when I was searching for a way to use some of my 16 cups of pumpkin puree.  Yes...you read that correctly.  16 cups.  That's enough for EIGHT pumpkin pies and I wasn't about to do that!

When you get over the fact that this is a non-traditional pizza without any sauce and instead think about the ingredients it does have, it starts to make a lot of sense.  Brie and apples aren't anything out of the ordinary.  Sausage is always delicious.  And pumpkin pizza crust?  Just a small departure from pumpkin bread.  Starting to warm up to the concept already, aren't ya? :)

I have to say that I truly fell in love with this pizza.  It has a subtle pumpkin flavor but you can tell it's there by the fun slightly orange color of the dough.  I'm actually starting to formulate a dessert pizza in my head using this crust...

Melty brie.  Need I say more?

Sweet apples and salty sausage meld together to form this unique glaze-like "sauce" on the crust.  And then to finish, instead of arugula I added some fresh sage which left me wanting more with every bite.

It was really quite a delicious Fall treat!  This pizza could make a great Thanksgiving appetizer (cut into smaller rectangular pieces a la Donatos pizza style) or dinner entree.  Please give this one a try.  You won't regret it!

One Year Ago: Spicy Garlic and Ginger Chicken with Green Beans and Smoked Macaroni and Cheese
Two Years Ago: Caramelized Onion Mashed Potatoes
Four Years Ago: Spinach, Sausage and Cheese Manicotti

Apple, Brie, and Sausage Pizza on a Pumpkin Crust


Ingredients

For the Pumpkin Pizza Dough
  • 1 1/2 tsp yeast 
  • 3/4 cups warm water (~110 F), divided 
  • 5 TBSP + 1 tsp brown sugar 
  • 1 TBSP unsalted butter 
  • 1 tsp salt 
  • 3 cups all-purpose flour
  • 3/4 cups pumpkin puree
For the Pizza
  • Corn meal
  • 4 baking apples such as Fuji, Honeycrisp, or Granny Smith
  • 4 oz brie 
  • 2 spicy Italian turkey sausage links, casings removed 
  • 4-6 fresh sage leaves, rubbed and chopped chiffonade
Directions
  1. In a small bowl, proof the yeast by combining it with 3/8 cup warm water and brown sugar.  Let sit for about five minutes or until it starts foaming. 
  2. Meanwhile, in a small saucepan, combine butter, salt, and the remaining 3/8 cup water. Heat until the butter melts. Let it cool until warm, but not hot. 
  3. Pour butter mixture into the yeast mixture and then into the bowl of a stand mixer. Mix the pumpkin puree into the yeast and butter mixtures. Then mix in the bread flour. Using the bread hook attachment, mix the dough on speed 2 for 10 minutes. Cover the bowl with a damp kitchen towel and allow the dough to rise in a warm place until doubled, about one hour. 
  4. Preheat oven to 500. Sprinkle some corn meal onto pizza pan.
  5. After dough has risen, flour it and shape into a ball.  Stretch into desired size and shape. Place on prepared pizza pan. Bake for 3-4 minutes and remove from the oven. 
  6. Meanwhile, cook sausage in a skillet over medium heat, crumbling it up using a spatula. Cut apples into thin slices. Layer onto pizza. Next layer slices of brie onto the pizza. Sprinkle with turkey sausage. 
  7. Bake assembled pizza for 10-12 minutes or until bottom of dough is starting to get brown.  
  8. Garnish with fresh sage and serve.
Source: Modified from Eats Well with Others as seen on PreventionRD

Monday, November 4, 2013

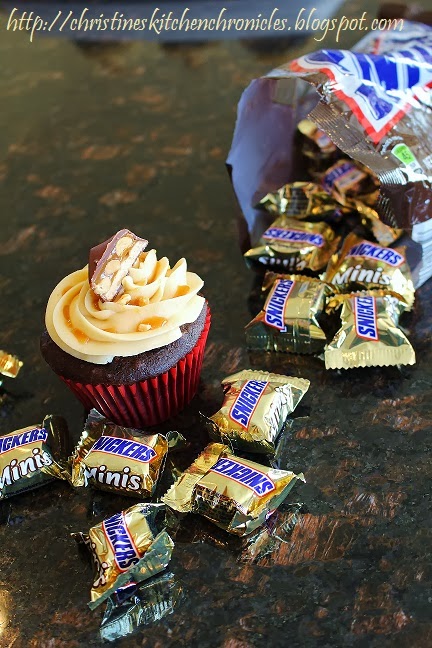
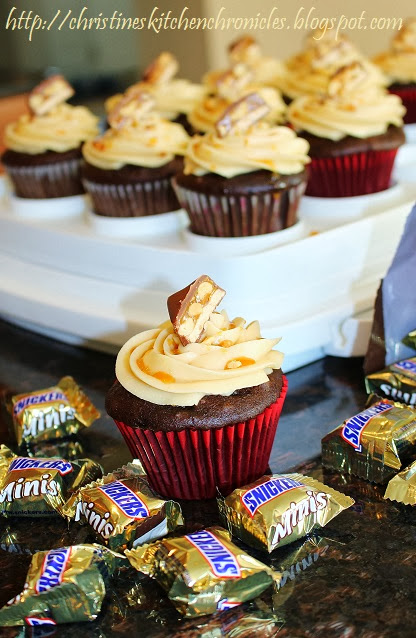
Snickers Cupcakes

Who has leftover Halloween candy?  Or did you already eat the loot and any personal remnants this weekend...and maybe even went back to the grocery store to buy the clearance candy?  It's okay to tell me if you did.  I won't judge.  We're all friends here :).

With the rain and spooky howling wind on Halloween night, we ended up with maybe half the number of trick-or-treaters that we normally get.  Some neighboring communities postponed their trick-or-treating.  To that I say "weak sauce!" and we used to go out in the SNOW and it was dark outside because we had daylight savings earlier back then.  But I digress.  For those that braved the weather we gave out extra candy and yet still had quite a bit remaining.

Snickers are my favorite candy.  I love the chewy nougat texture contrasting with the crunchy peanuts and sticky caramel.  What's not to love?

Snickers Cupcakes

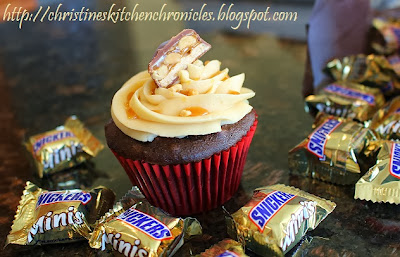
The only way that they could be better is by paying homage to them in the form of a cupcake.  I made these cupcakes for my son's 2 month birthday but they'd be a great way to use any leftover candy...or just because.

Snickers Cupcakes

It's essentially doctored up cake mix with a homemade caramel frosting.  I love foods that look "fancy" :).  Normally I'm adverse to using shortening but it makes the frosting whip up all silky like a dream.  I bet it'd be even more awesome with butter flavored shortening.  But if the thought of using shortening makes you absolutely gag then by all means feel free to use just all butter instead.  Mmm...butter...

One Year Ago: Best Potluck Mac and Cheese and Buca Di Beppo's Spicy Chicken Rigatoni
Two Years Ago: Mini Triple Treat CupcakesPeach Whiskey Barbecue Chicken, and Napa Cabbage Salad
Three Years Ago: Chicken and Cheddar Dog Treats
Four Years Ago: Turkey Bean Pumpkin Chili

Snickers Cupcakes

Snickers Cupcakes

Ingredients

For the Cake
  • Your favorite chocolate cake recipe or boxed chocolate cake mix (Being a new mom, I went boxed.  No shame in that!)
  • 24 frozen Snickers miniatures
For the Frosting
  • 2 sticks unsalted butter, room temperature
  • 1/2 cup shortening 
  • 2 teaspoons vanilla extract 
  • 1 1/2 pounds powdered sugar 
  • 1/3 cup caramel topping plus more for drizzling 
  • 1/4 teaspoon salt 
For the Decoration
  • 12 frozen Snickers miniatures
  • Caramel topping
  • Chopped peanuts
Directions

  1. Preheat oven to 350 F.  Line two 12-well muffin tins with paper liners.
  2. To make the cupcakes: In a large mixing bowl, prepare cake according to package directions.  Evenly divide the batter among the prepared pans.  Gently push a whole frozen Snickers Miniature bar into the center of the batter until the candy is flush with the surface of the batter.  Bake for 18-22 minutes, or until top is springy to the touch and a wooden toothpick inserted comes out clean. Cool cupcakes on a wire rack. 
  3. To make the frosting: Cream together the butter and shortening using an electric mixer. Beat in the vanilla extract, salt, and caramel topping.  Gradually add the powdered sugar, mixing thoroughly between additions until all of it has been added. 
  4. To decorate: Cut each remaining Snickers bar square on the diagonal so that you have 24 halves.  Garnish with chopped Snickers bar halves, chopped peanuts and a drizzle of caramel topping. 
Source: Frosting from My Baking Addiction

Monday, October 21, 2013

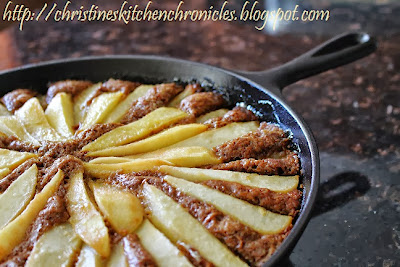
SRC: Ginger-Pear Skillet Cake

After a two month baby hiatus I'm back to my monthly Secret Recipe Club!  It's crazy to think that the last time I completed an assignment in July I had no baby and now, I have an absolutely adorable two month old baby boy.  I shared a picture of him with his "month birthday" cupcake on Saturday and let's just say that this mama has a new favorite photography subject :).

This month I received Kristy's blog, Gastronomical Sovereignty.  I'll admit that now that I'm a mommy, I don't always have a ton of time to browse blogs and read the content that goes along with each post but Kristy is gosh darn funny.  I truly enjoyed reading through her commentary.  Another thing I found in common with her was that we both partake in CSAs (community supported agriculture).  If only I had known about her blog when I was still getting my weekly boxes and standing there wondering what to make with my umpteenth bunch of chard...

What's wonderful about a CSA besides supporting a local farmer is that you know you're getting food that's fresh and in season.  When food is in season and not shipped from thousands of miles away, it's fresh and at its peak.  It's better tasting and full of nutrition...the way that Nature had intended.

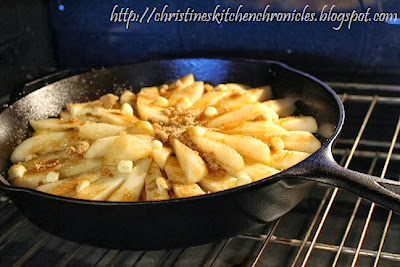
This is why I chose a seasonal recipe from Kristy's blog.  I went straight for the "Fall" tag and was excited to make a cake in my cast iron skillet.  It's something that I've always wanted to try.  When I was baking this cake, my house smelled like Autumn.  Warm spices that taste like gingerbread and juicy pears.  It was heavenly.

Christine's Kitchen Chronicles: Ginger-Pear Skillet Cake

Top it with some vanilla ice cream and your life will be complete...

Christine's Kitchen Chronicles: Ginger-Pear Skillet Cake

I had to wait until supper time to make it a la mode and enjoy this beauty because I was bringing it to my in-laws' house.  I'm always fascinated by how natural light (see the third photo on this post) versus artificial (first two photos) makes a huge difference in the quality of the photo.  That's one down side to Fall's arrival is shorter days = less light = uglier food photos.  Sorry about that!

One Year Ago: Cinnamon Sugar Baked Pumpkin Doughnuts
Two Years Ago: Apple Pie Cookies
Four Years Ago: Christine's Fried Rice

Ginger-Pear Skillet Cake


Christine's Kitchen Chronicles: Ginger-Pear Skillet Cake

Ingredients

For the Cake
  • 2 1/3 C Unbleached All-Purpose Flour
  • 1 1/2 tsp Ground Ginger
  • 1 tsp Kosher Salt
  • 1 tsp Ground Cinnamon
  • 1/2 tsp Ground Allspice
  • 1/4 tsp Ground Cloves (optional)
  • 1/4 C Canola, Grapeseed, or Other Neutral Vegetable Oil
  • 1/2 C Gently Packed Light Brown Sugar
  • 1/2 C Unsulfered Dark Molasses
  • 1/2 C Plain Whole Milk Yogurt or Sour Cream
  • 1 TBSP Fresh Ginger, finely grated
  • 1 Large Egg, at room temperature
  • 1 tsp Baking Soda
  • 1/2 C Hot, Fresh Brewed Strong Coffee (recommended) or Boiling Water
For the Topping
  • 4 Firm-Ripe Pears, peeled, cored, and cut into 1/2 inch thick slices (Bosc or Anjou are good)
  • 1 Tbsp Unsalted Butter, cut into small pieces
  • 1/4 C Gently Packed Light Brown Sugar
  • 1/4 Tsp Kosher Salt
Directions
  1. Place rack of oven on the lower third and preheat to 325F. Generously grease a 10 or 11 inch cast-iron skillet. 
  2. In a large bowl, stir together the flour, ground ginger, salt, cinnamon, allspice, and cloves (if using). Set aside. Whisk together the oil, brown sugar, molasses, yogurt, fresh ginger, and egg in a large bowl until well blended and smooth. Using a wooden spoon or spatula, stir in half of the flour mixture. Stir the baking soda into the hot coffee until dissolves, then add to the batter and stir until combined. Stir in the remaining flour. Transfer the batter to the prepared skillet and spread evenly. 
  3. Arrange the longer slices of pear in a circle along the edge of the pan, overlapping them slightly and with the narrow ends pointing toward the center. Arrange the shortest slices in a second circle in the center to cover the batter completely. Dot the pear slices with the butter along the outer circle only. Mix together the brown sugar and salt and sprinkle evenly over the top.
  4. Bake until the top springs back when you press it lightly in the center and a toothpick inserted in the center comes up clean, about 1 hour. Transfer the skillet to the stove top to cool for at least 20 minutes. 
  5. Cut cake into wedges and serve warm or at room temperature topped with whipped cream or vanilla ice cream, if desired.
Source: Farmers' Market Desserts by Jennie Schacht as seen on Gastronomical Sovereignty

Thursday, October 10, 2013

Chewy Butterfinger Cookies

See the giant chunks of Crispity Crunchity Butterfinger Goodness in the photo below?  They were apparently too much for my body to handle.  These will forever be known as "Labor Cookies" thanks to my friend Scott.  Literally the same night that I made and ate (probably too many of) these cookies, I went into labor after going nearly two weeks post-date.  My camera went from taking glamour food photos like this...


To the next photo of my son wailing while getting his first bath at home.  To say our lives changed in a blink is an understatement...


Yep...he really hated bath time in that infant tub.  It caused my husband and I much distress and we dreaded bath days.  The only upside was that he was so tired afterward that he would often sleep through the night (7 straight hours!).  But as for the bath thing, thankfully some mommies on my local message board suggested using the regular tub and getting in with him.  He seems to like this much better.

I digress.  You're here for the Labor Cookies.  I mean, Chewy Butterfinger Cookies.  For those that are currently pregnant, fear not for these cookies will not induce labor.  That is, unless you want them to.  Then it can't hurt to try.  But no, really.  There's no medical reason that these will do anything to you other than spike your blood glucose and make your mouth and tummy feel really happy.

This is a quick and delicious way to use up those candy bars that you'll get at Halloween.  Or...on clearance after Halloween.  Or heck, for those Butterfingers that you have just because they're delicious.

Maybe my son would like some Lactation Cookies, next...

Chewy Butterfinger Cookies


Yield: About 2.5 dozen cookies

Ingredients
  • 1 and 3/4 cups all-purpose flour 
  • 3/4 teaspoon baking soda 
  • 1/4 teaspoon salt 
  • 3/4 cup granulated sugar 
  • 1/2 cup (1 stick) salted butter, softened 
  • 1 large egg
  • 8 fun sized (or 2 King sized) Butterfinger candy bars, chopped
Directions
  1. Preheat oven to 375F degrees.
  2. Combine flour, baking soda, and salt in small bowl and set aside. 
  3. With an electric mixer, beat together sugar and butter until creamy. Beat in egg until just combined. Gradually add in flour mixture. Gently stir in Butterfinger pieces. The dough will be very thick  (if it's too dry and crumbly you can add an extra egg). Drop by slightly rounded tablespoonfuls onto ungreased baking sheet (or for a perfect shape use my favorite cookie tool...a Medium OXO Cookie Scoop).
  4. Bake for 10-12 minutes or until lightly browned. Allow to cool and enjoy!
Source: Sally's Baking Addiction

Wednesday, October 9, 2013

Hawaiian Roll Ham and Swiss Sliders

These sandwiches have circulated the internet since the beginning of time.  Okay.  Maybe not really but it sure seems like it.  I cannot tell you how many times I have seen them appear on other blogs and always with rave reviews.  I bookmarked this or similar recipes more times than I can count.  So what made me finally break down and make them?  Actually *tasting* them for myself when my cousin-in-law Mandy made them for her annual pool party.

They were like little bites of soft-but-slightly-crunchy buttery Heaven melting in my mouth.  Sweet, salty, delicious.  My husband and I tried to limit ourselves at the party because there weren't that many but when I made it at home?  All bets were off.  The fact that it was doused in butter didn't matter because it just tasted too good.  We devoured three sandwiches each!

Oh and have you ever passionately disliked an ingredient?  Like...pretended to be "allergic" to it because you so vehemently hated it?  My husband is this way with mustard.  He claims that the mere sight or smell of it will make him throw up.  He literally closes his eyes if I'm eating something with visible mustard next to him.  Honey, I'm so sorry to tell you that these sandwiches that you loved so much and even got excited all over again when you saw me photo editing this for my blog...these contain...mustard.

I always feel so guilty and devious when I try to "sneak" forbidden ingredients into our meals but it just goes to show you that what you don't know won't hurt you!  Plus, it'll be great practice for when I have to hide veggies and such in Alex's food ;).

One Year Ago: Chicken Marsala Risotto
Two Years Ago: Roasted Butternut Squash Soup

Hawaiian Roll Ham and Swiss Sliders


Ingredients
  • 12 Hawaiian sweet dinner rolls 
  • 1 pound thinly sliced deli sandwich ham (preferably honey baked or brown sugar)
  • 6 slices Swiss cheese, cut in half
  • 1/2 c butter, melted 
  • 1 Tbsp poppy seeds 
  • 1 1/2 tsp worcestershire sauce 
  • 1 1/2 tsp brown or dijon mustard 
  • 1 tsp onion powder
Directions

  1. Slice the rolls in half to form a bun and place bottoms in baking pan. Layer ham (I folded each slice into quarters and used 2 slices on each roll) and cheese halves on rolls. Replace tops. 
  2. Combine butter, poppy seeds, mustard,Worcestershire, and onion powder and mix well. Drizzle over rolls. Refrigerate until butter is firm or overnight. 
  3. Cover with foil and bake at 350° for 30 minutes or until cheese melts. Uncover and cook for 2 additional minutes. Serve warm or cold.
Source: Just a Pinch Recipes

Monday, October 7, 2013

Meatless Monday: Tomato Florentine Soup

Fall is here.  I think?  It has been surprisingly warm and humid here in Ohio recently.  But this past week there was a cool, rainy day and I thought hey.  Soup's on for dinner!

I'm a sucker for a good homemade soup and with the baby, I need to be even more choosy with the meals that I make and the ones that I spend time to write about to share on my blog.  This one is worth it.  It's quick to come together, full of tomatoey flavor, and quite nutritious from a healthy dose of spinach.  Part of me thinks that my son is so strong because of all that spinach, kale, and chard that I ate while pregnant!

I don't think I have to tell you that tomato soup goes well with grilled cheese, right?  Still, I have another delicious sandwich suggestion that I'll be sharing later this week...

This soup is best fresh because the pasta will suck up the soup as it sits overnight.  I was shocked at how much my ditalini pasta swelled when I tried to reheat it the next day.  It was still good but benefited from the addition of extra broth (or water) to make it soupy again.  Still, nothing can fix that, slightly-too-mushy pasta texture.  So yes, eat up my friends!  (I ate 3 bowls...)

One Year Ago: Southern Comfort (Drunken) Caramel Apple Pie, Banana Pumpkin Nutella Bread, and Breakfast Skillet
Two Years Ago: Pumpkin Pecan Loaf and Brown Sugar Spice Cutout Cookies with Maple Icing
Four Years Ago: Sugary Sweet Chili

Tomato Florentine Soup


Ingredients
  • 2 TBSP unsalted butter 
  • 1 (14.5 oz) cans fire-roasted diced tomatoes, drained and juice reserved 
  • 1 (28 oz) can sliced stewed tomatoes, drained and juice reserved
  • 1 medium onion, chopped fine 
  • 1 TBSP packed brown sugar 
  • 1/4 tsp crushed red pepper (or to taste) 
  • 2 rounded TBSP all-purpose flour 
  • 3 garlic cloves, minced 
  • 4-5 cups low-sodium chicken broth or vegetable broth (adjust the liquid amount depending on how "soupy" you like your soup to be!)
  • 4 oz (1 cup) small macaroni, ditalini, tubettini, or other small shaped pasta
  • 10 oz (10 cups) fresh baby spinach 
  • Kosher salt and freshly ground black pepper, to taste
Directions
  1. Melt butter in a Dutch oven over medium-high heat.  Add tomatoes and onion and cook until the tomatoes get dry and begin to brown, about 10-12 minutes.  
  2. Add brown sugar, red pepper flakes, flour, and garlic.  Cook until fragrant, about 1 minute.  Slowly whisk in the broth and reserved tomato juice, scraping up any browned bits and smoothing out any lumps as you go.
  3. Stir in the pasta and bring to a boil.  Reduce heat to a simmer and cook until pasta is tender, about 10-12 minutes, stirring occasionally.
  4. Stir in the spinach and cook until wilted, about 1-2 minutes.  Taste and adjust seasoning with salt and pepper as desired.
Source: Slightly modified from Pink Parsley as adapted from The America's Test Kitchen Quick Family Cookbook

Tuesday, September 17, 2013

Cones for the Cure Winner and Grilled Zucchini, Yellow Summer Squash and Red Onion with Lemon-Basil Vinaigrette

Hi fans!  I'm here to announce the Cones for the Cure Giveaway Winner and while I'm at it, I wanted to share a recipe for Summer's last hurrah as Fall seems to be rapidly upon us!  Oh, and in other news, we finally took the plunge and bought one of those fancy dSLR cameras so we could take lots of great pictures of our little cutie.  This also means better (hopefully!) food photography coming your way.  What do you think??

First thing's first, congratulations Kesha G. for winning the prize pack.  I've sent you an email with details on how to claim your prize.  I hope you enjoy the goodness!

Now for this recipe.  I loved grilled veggies but it never fails that when I send my husband out to grill em up, many of them end up as grill casualties when they slide down between the grates during transfer and/or flipping.  With this recipe, I skewered the vegetables for him so that they'd stay intact.  Good thing too because while the recipe said it served 4-6, I doubled it and it still only seemed to serve 4-6 which was a bummer considering I was trying to serve 10.  I made changes to the below so that you can get sufficient quantities and not be disappointed with your yield.  The flavor was wonderful so it was too bad we had to ration it...loved that caramelized flavor with the brightness of the lemon!  You can use whatever veggies you have on hand.  The farm had sent us zucchini and yellow squash so that's what I used.  I would have loved to add eggplant if we had it.  Yum!

One Year Ago: Chicken Fajita Lettuce Wraps
Two Years Ago: Foil-Baked Fish with Black Beans and Corn
Three Years Ago: Pineapple Teriyaki Chicken
Four Years Ago: Sausage, Pepper, Onion, and Green Pepper Fra Diavolo

Grilled Zucchini, Yellow Summer Squash and Red Onion with Lemon-Basil Vinaigrette 


Grilled Zucchini, Yellow Summer Squash and Red Onion with Lemon-Basil Vinaigrette

Ingredients
  • 1 lb zucchini, sliced into 1/3-inch rounds 
  • 1 lb yellow summer squash, sliced into 1/3-inch rounds
  • 1 red onion, sliced into 1/2-inch rounds 
  • 1/2 cup + 3 Tbsp olive oil 
  • Salt and pepper, to taste
  • 2 cloves garlic, minced 
  • Zest and juice from 1 lemon (preferably organic)
  • 2 tsp spicy brown mustard 
  • 6-8 large basil leaves, chopped
Directions

  1. Heat grill to medium and prepare skewers by soaking in water per the instructions on your package.
  2. Carefully thread the onion rounds onto prepared skewers, taking care to ensure the skewer goes through every onion ring.  If desired, thread the remaining vegetables onto skewers as well.  
  3. Brush onions, zucchini, and yellow summer squash rounds with 1/2 cup olive oil and season liberally with salt and pepper. 
  4. Grill vegetables 9-10 minutes each side, until nicely caramelized. 
  5. In a small bowl, whisk garlic, lemon juice, zest, mustard, remaining 3 tablespons oil, and a pinch of salt and pepper together.
  6. Place cooked vegetables on a platter, drizzle with dressing, and top with chopped basil leaves.

Source: Barely modified from Confections of a Foodie Bride

Friday, September 13, 2013

Second Free Cone Giveaway Date!

Have you stopped in to make a donation to the Cones for the Cure campaign yet?  I stopped in on the last free cone day and made my donation of $5 to get a sweet Graeter's coupon book.  It included another free cone coupon and a coupon for a free pint with a $15 purchase.  Money well spent towards a good cause and the extra sweets provide extra incentive ;).


As of Monday, $25,000 had already been raised for the 2013 campaign. Their goal is at least $40,000 so please stop in and help them reach it!

This coming Monday, September 16 from 3-8PM will be the second free Elena's Blueberry Pie cone giveaway day so make sure to stop in to support the cause!

Also, my Cones for the Cure prize pack giveaway is still going on for those that can't make it into the scoop shop.  Enter to win here!


Friday, September 6, 2013

More Elena's Blueberry Pie and a Giveaway!

Hi fans!  Did you get your free ice cream on Wednesday and make a donation to The Cure Starts Now yet?  If you can’t get enough of Graeter's Elena’s Blueberry Pie Ice Cream, stop by the Glendale Beer, Wine & Food Festival tonight for a special “Happy Hour” giveaway from 6-7 PM!

I also have a Cones for the Cure prize pack giveaway that will go from September 9 - 16.  It includes a $5 Graeter's giftcard, $7 worth of candy, Notes Left Behind book, and some other goodies!  Enter below for your chance to win!

Last but not least, check back again before September 16th for the announcement of the second and final free cone giveaway date!

a Rafflecopter giveaway

Wednesday, September 4, 2013

Orange Push-Up Smoothies

Hi!  I'm popping in really quickly to share a quick recipe.  Who remembers those orange push up pops with the primary colored dots on the outside?  They remind me of my Grandparents because they always bought them for us when we visited.  It's been years since I've had one and frankly, I'm not sure if they still make them anymore?

When I made this recipe, it reminded me of that long lost orange push-up pop flavor.  The only difference was that it was in the form of a smoothie rather than the classic and fun push-up pop.  Depending on the brand of orange concentrate you use you may need more or less sugar as there are varying levels of "orange peel" bitterness to each brand.

Bottoms up and here's to our childhoods!

Orange Push-Up Smoothies


Orange Push-Up Smoothies

Ingredients

  • 1 can orange juice concentrate, slightly thawed 
  • 1 cup milk 
  • 1/2 cup sugar, or to taste
  • 1/2 teaspoon vanilla extract 
  • 2 cups ice, or to taste 
Directions
  1. Combine all ingredients, except for the ice, in a large blender and blend until smooth and creamy, taking care the sugar has dissolved and is well incorporated. If desired, add a splash more water or more milk. Add the ice and blend until smooth. Makes approximately three eight-ounce portions.
Source: Averie Cooks as seen on Delicious Melicious

Monday, September 2, 2013

Cones for the Cure Kick Off

Free ice cream.  Curing cancer.  These are both wonderful things!  As a Christine's Kitchen Chronicles reader you're getting the inside scoop on how these two things go together.

I'm happy to announce the kickoff of this year's annual Cones for the Cure campaign.  The Cure Starts Now and Graeter’s team up once again this September in their annual Cones for the Cure campaign. This two-week long campaign will take place September 4-16 at participating Cincinnati, Dayton, Columbus, Lexington and Louisville Graeter's locations to help spread the word about The Cure Starts Now and its mission to find the “homerun” cure for all cancers by focusing on pediatric brain cancer.  It's a delicious way to support a precious cause.

During Cones for the Cure, guests that visit a Graeter’s store during the campaign period have the opportunity to donate a $1 or $5 “Cone for the Cure.” Graeter’s will also offer a $15 savings booklet for every donation of $5 or more to The Cure Starts Now.

Watch this short video to learn more about Cones for the Cure and Elena's Blueberry Pie special ice cream (Note: this video was created in 2011 so the date mentioned for the campaign is incorrect):


Remember how I mentioned free ice cream?  All local Graeter's will also be offering free scoops of their Elena's Blueberry Pie Ice Cream from 3-8 PM on Wednesday, September 4th.  Elena’s Blueberry Pie is a special flavor that was created in honor of 6-year-old Elena Desserich who was lost to cancer in 2007.  Stop into your local Graeter's shop for this delicious treat and while you're there, please don't forget to make a donation.  In 2012, nearly 40,000 people participated in the campaign which generated over $42,000 for The Cure Starts Now.  With your help, here's to hoping the 2013 campaign is even more successful!

Can't make it on September 4th?  Check back between now and September 16th for another free scoop date to be announced!  Also, there will be a special online giveaway for one lucky reader.

Tuesday, August 27, 2013

Meet Alexander James!

Hi everybody! I'm not sure if you've noticed my absence at all but I have a good excuse this time. As I announced to my facebook fans, I'm proud to let you know that my baby boy has finally arrived!

I'll be back in due time with new recipes but in the meantime, meet little Alexander James!


Who has time to blog when there's that cutie waiting to be cuddled??  Hope you'll excuse me while I disappear for awhile :).

Thursday, August 8, 2013

Copycat McDonald's Sausage Egg McMuffins

Is anyone else a fan of breakfast?  How about Sausage Egg McMuffins from McDonald's?  I hardly ever eat at McDonald's but I LOVE their Sausage Egg McMuffins.  If I'm feeling really good, I'll even splurge on some hashbrowns.

When it came time to round-out my freezer stash with some breakfasts, I knew I wanted to try to make my own version at home.  What is about to follow is a copycat recipe but honestly, it's such an easy thing to make that I use the term "recipe" loosely.  If you want, you could also leave out the sausage or substitute Canadian bacon or regular bacon.

The hardest part was figuring out how to make a round egg "patty" like they do...because I'm anal and like everything to be round and match.  For that, I used what I had on hand and that was canning bands.  They were slightly smaller than the English muffins but close enough.  I experimented a bit on whether it was better to put them with the thread-side up or down.  In the end, threads up seemed to work better in terms of getting a better spray and containing the eggs (the picture below is from one of my earlier runs but I got better at avoiding spillage over time!).  If you greased your rings well, the eggs should fall out pretty easily but some of them required a little more oomph.  I just separated the crusty parts that stuck to the rings then pushed them out gently with my fingers.

These are totally yummy and I am so grateful to have about 2 1/2 dozen of them stashed away in the freezer. Having a good (and fast, one-handed) breakfast is the key to starting your day off right!

One Years Ago: BLT Corn Salad Wrap
Two Years Ago: Jerk Chicken with Mango Cilantro Relish

Copycat McDonald's Sausage Egg McMuffins


Copycat McDonald's Sausage Egg McMuffins

Ingredients
  • 12 English muffins
  • 12 slices American cheese
  • 12 fully cooked frozen sausage patties
  • 12 large eggs
  • Salt and pepper
Directions
  1. Place canning bands with thread side up into a skillet over medium-high heat (or if you have them or want to buy something fancy you can use something like these egg ring rounds).  Spray pan and inside of bands generously with cooking spray.

  2. Crack an egg into each band and sprinkle each with salt and pepper.  Use a knife to gently break each yolk so that it spreads out.  Don't worry if the egg spills out of the rings, if you're a perfectionist, you can peel or cut them off later.  Cover and cook through.  When eggs are done, remove the egg-filled ring using tongs and gently push the eggs out of the rings.  Set aside for assembly.

  3. Meanwhile, split your English muffin and place a slice of cheese on the top of each muffin half.  If desired, fold over each cheese corner so that it is the same size as the muffin.  Place a frozen sausage patty on the bottom of each muffin then top with a cooked egg round.  Put the two halves together to form the sandwich.
  4. Wrap each sandwich in square of deli paper wrap (or just use parchment paper).  
  5. To enjoy now: Microwave sandwich until sausage patty is cooked through, about 45 seconds to a minute.  To enjoy later: Place wrapped sandwiches into gallon sized freezer bags, squeezing out as much air as possible.  When ready to eat, microwave from frozen until heated through, about one minute to 90 seconds.  Flip the sandwich halfway through cooking for more even heating.
Source: Christine's Kitchen Chronicles as inspired by McDonald's

Monday, August 5, 2013

Pepperoni Pizza Puffs

This is it my friends.  The final week of pregnancy...at least according to my estimated due date!  Of course, we all know that baby will make his appearance when he's good and ready so he could stick around another two weeks before my OB would consider intervening.  Good thing I'm not *too* uncomfortable yet.

I've been spending the past couple weeks filling my freezer with all sorts of goodies so that we won't starve after baby arrives.  It takes me a little longer than normal to prep things because I need to take frequent breaks and my feet/ankles look gigantic (my sister affectionately calls them "fat kid feet") once I'm done but I know it will all be worth it in the end.  As long as baby stays put, I'll continue to grow my freezer meal stash!

Last week I posted a teaser pic of these pepperoni pizza puffs and had more than one request for the recipe.  I had actually made these for my friends Kristen and Sig when they had their little boy but apparently I never got to blogging about them so here they are now!

They're a bit like cheesy dough puffs (reminding me of the Brazilian cheese bread pao de queijo for those familiar) filled with pepperoni and then served with pizza sauce for dipping.  Of course feel free to substitute whatever pizza toppings you enjoy.  I freeze them on a baking sheet first so they don't clump together and then dump them into a plastic freezer bag.  To reheat, I just pop them in the microwave.  Easy peasy one-handed eating and kid-friendly, too!

One Year Ago: Creamed Corn and Watermelon Slush
Two Years Ago: Five-Minute Healthy Chunky Monkey Ice Cream (one of my favorite treats anytime but especially during pregnancy!)
Four Years Ago: Grands! Taco Melts aka Homemade Hot Pockets (I haven't tried it before but I bet this would also make a great freezer lunch if you fully prepared it and then followed a similar freezing method as in these pizza puffs!)

Pepperoni Pizza Puffs


Pepperoni Pizza Puffs

Ingredients
  • 3/4 cup flour
  • 3/4 teaspoon baking powder
  • 3/4 tsp Italian seasoning
  • 3/4 cup milk
  • 1 egg, lightly beaten
  • 1 cup mozzarella cheese, shredded
  • 4 oz (about 1 cup) pepperoni, cut into small pieces
  • 1/2 cup pizza sauce
  • 2 Tablespoons fresh basil, finely chopped
Directions
  1. Preheat oven to 375 degrees.  Prepare a 24-cup mini muffin pan by spraying with cooking spray.
  2. In a large bowl, whisk together the flour, baking powder, and Italian seasoning.  Add the milk and egg.  Finally, stir in the mozzarella and pepperoni and then let the mixture stand for 10 minutes.
  3. Give the batter a stir then divide evenly among the mini muffin cups.  Bake until puffed and golden, about 20-25 minutes.  If you intend to freeze them, remove the puffs from the pan while still warm and then arrange in a single layer on a baking sheet to freeze.  Once frozen, transfer to a ziploc freezer bag, removing as much extra air as possible.
  4. When ready to serve, microwave the pizza sauce until warmed through, then stir in basil.  Serve warm puffs with pizza sauce for dipping.
Source: Barely modified from Noble Pig

Friday, July 26, 2013

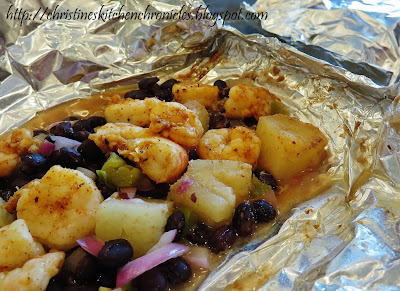
Recipe Swap: Shrimp, Black Bean, and Pineapple Foil Packets

Okay.  I need to GET ON THE BALL.  This pregnancy brain thing really sucks.  It's about 10:50PM on Thursday and this post is supposed to be going live at 7AM on Friday.  And I have had an ENTIRE MONTH to make and schedule it.  In all fairness, I did actually make my swap recipe a couple weeks ago.  It was the whole blog posting part that I've been putting off.  Sometimes, it just seems like so much work...but enough whining for now.  I'm just being a cranky 38 week pregnant lady :P.

Anyway, this is the What's Cooking recipe swap hosted by Sarah at A Taste of Home Cooking.  The theme is Grilled Foods and I received a recipe from Jenna at Jenna's Cooking Journey.  You may recognize her as the guest blogger that brought you these yummy Oatmeal Carmelitas awhile back.

As for this recipe, I've actually made it before but it didn't make it onto the blog.  The reason for that was that unlike the similar Foil Baked Fish with Black Beans and Corn recipe which I adore, this one just lacked flavor to me.  I only share recipes which I and/or my husband enjoy.  But as it was a swap recipe, I dutifully made it again.  And unfortunately, it fell flat for me, again.  I love pineapples and jalapeno peppers and shrimp.  It really should be a winner in theory but you can't win them all.  I don't know what's wrong with me...it seems to get such rave reviews by other bloggers!  Thanks anyway Jenna for having me give it another shot.  And dear readers, since so many others like it, you should probably give it a try for yourself  even if I didn't care for it :).

One Year Ago: Pasta with Grilled Plum Tomato Sauce and Magic in the Middles (peanut butter stuffed chocolate sugar cookies!)
Two Years Ago: Bob's Mexican Stuffed Chicken

Shrimp, Black Bean, and Pineapple Foil Packets


Shrimp, Black Bean, and Pineapple Foil Packets

Ingredients
  • 8 oz raw, medium sized shrimp (peeled, deveined) 
  • 1 15-oz can black beans, drained and rinsed 
  • 1 cup pineapple, finely chopped 
  • 1/3 cup red onion, finely chopped 
  • 1/2-1 jalapeno pepper, minced (depending on the amount of spice you want) 
  • 2 tablespoons pineapple juice, divided 
  • 1/2 teaspoon ground coriander 
  • 1 teaspoon ground cumin, divided 
  • pinch of salt 
  • freshly ground black pepper 
  • 2 tablespoons chopped cilantro 
  • 1/2 avocado, diced
Directions
  1. Preheat grill to medium. 
  2. Rinse the shrimp and pat dry. Sprinkle with 1/4 teaspoon cumin, chili powder, salt and pepper. Toss to coat. Set aside. 
  3. In a medium bowl, combine the black beans, pineapple, red onion, and jalapeno. Stir in 1 tablespoon pineapple juice, coriander, and remaining 1/2 teaspoon cumin. 
  4. Spray two large pieces of aluminum foil with cooking spray. Spoon half of the black bean mixture into the center of each and top with half of the shrimp. Pour the remaining pineapple juice over the shrimp. Bring the edges of the foil together and fold down, sealing well. 
  5. Place the foil packets on the grill, cover, and cook for 10-12 minutes, until shrimp are opaque. Carefully open the foil packets and stir the contents. Top with the diced avocado and sprinkle with cilantro. 
Source: Jenna's Cooking Journey as modified from PreventionRD

PS: It's now going on 11:10PM.  See, these posts don't just write themselves, ya know!  Ah this blog is a labor of love :P.

Monday, July 22, 2013

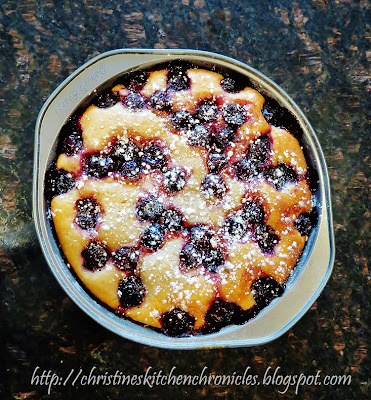
SRC: Cherry Cake

This is my last Secret Recipe Club entry for at least a month if not two since Baby Boy could be arriving at any moment now.  The fact that he could come anytime between today and 5 weeks from now and still be considered "normal term" baffles my mind.

This month I was assigned The Avid Appetite.  I love how personal she makes her blog as it's not just about food but also about her family (what a cute little one!) and travels, too.  I could have spent hours perusing but with limited time on my hands, focused on the recipes where I debated the Pretzel Crusted Brownies with Fluffy Buttercream Icing (and we all know that it would have become PEANUT BUTTER buttercream in this house!), the Banana Bread Smoothies (because I've been craving frozen treats with this baby!), and a Cherry Cake which was made as a SRC swap.

Ultimately the Cherry Cake won...but only because the sweet allure of cherries in July.  I try not to make a swapped recipe because I want to highlight something from the assigned blog but I just *really* love cherries and so it was calling me.  I substituted 0% Fage Greek yogurt for the buttermilk.  Also, I don't own an 8" springform so used a regular cake pan and just made sure to grease and flour it generously but otherwise stayed true to the recipe.

I brought this sweet little cake over to my friend Emily's house where we three women literally killed this cake.  To be fair, we were two nursing and one pregnant ladies :).  This is justifiable, right??  To satisfy my frozen treats craving, we served ours a la mode with Cincinnati's best...Graeter's  brand vanilla ice cream.  Soooo delicious together!

One Year Ago: Cold Avocado Soup with Sweet Corn and Bacon and Pineapple "Ice Cream"
Two Years Ago: Peanut Butter Banana Chocolate Chip Cookies
Three Years Ago: Chocolate Chip Sour Cream Coffee Cake
Four Years Ago: Honey Lime Grilled Chicken

Cherry Cake

Cherry Cake

Ingredients
  • 1 c all-purpose flour
  • 1/2 tsp baking powder
  • 1/2 tsp salt
  • 1/8 tsp ground cinnamon
  • 3/4 c sugar
  • 1/4 c unsalted butter, room temperature
  • 1/3 c non-fat Greek yogurt
  • 2 large eggs
  • 1 tsp vanilla
  • 12 oz. frozen whole sweet cherries, pitted
  • powdered sugar for dusting
  • vanilla ice cream for serving (optional)
Directions
  1. Preheat oven to 350 degrees.  Grease an 8" springform pan with butter or generously butter and flour a regular 8" cake pan.
  2. Whisk together flour, baking powder, salt, and cinnamon.  In the bowl of a stand mixer, cream together the butter and sugar.  Add Greek yogurt and mix until blended.  Add eggs one at a time.  Mix in the vanilla.  Stir in the dry ingredients until just combined.
  3. Pour batter into prepared pan.  Place cherries on top of the cake batter and then lightly press them into the batter.
  4. Bake for 40-45 minutes until a toothpick comes out clean.
  5. Let cool completely.  If using a springform pan, remove the sides and then dust with powdered sugar.  If using a regular cake pan, simply dust with powdered sugar.   Serve at room temperature and with a big scoop of vanilla ice cream, if desired.
Source: Barely modified from The Avid Appetite

Secret Recipe Club

Wednesday, July 10, 2013

Caprese Burgers with Pesto Mayonnaise

It's Summertime and you know what that means...grilling!  And farm fresh veggies!  Hooray!

With the first red tomatoes of the season rolling in from my CSA farm share I decided to make a very simple burger that would highlight the super fresh flavors.  And when I say "I" made this meal I really mean that I sent my husband outside in the heat to go grill up these burgers :D.  Yet another reason grilling makes the menu...it's group participation from the hubby!

The original recipe called for sliders but we had a pack of leftover pre-made patties so ours were regular sized burgers.  Personally I think it works out better because the size of the tomato and mozzarella is a better match, anyway.  This was a great quick meal that will have you spending virtually no time to make and you can use any extra topper ingredients to make a fast Caprese Salad on the side.  For the salad, just layer the mozzarella, tomatoes, basil then drizzle with extra virgin olive oil and balsamic vineagar.  Season with fresh cracked pepper and sea salt and you're good to go!

Caprese Burgers with Pesto Mayonnaise


Caprese Burgers with Pesto Mayonnaise

Ingredients

  • 1 pound ground beef
  • Salt and pepper
  • Fresh mozzarella, sliced
  • 1 tomato, sliced
  • Fresh basil leaves
  • Burger buns
  • 1/2 cup mayonnaise (As usual I used Fat Free Greek Yogurt instead)
  • 1/4 cup pesto

Directions

  1. Mix salt and pepper into beef (or if using pre-formed patties, season each side of the patty).  Place on a hot grill and cook through, flipping once.  Near the end of the grilling time, add cheese.  Cover grill and cook for a few minutes until the cheese is melted.
  2. Meanwhile, mix together the mayonnaise and pesto in a small bowl.  Set aside.
  3. Place burger onto bottom half of bun.  Top with tomato and basil.  Spread pesto mayonnaise on top half of bun.  Serve.

Source: I was Born to Cook 

Monday, July 1, 2013

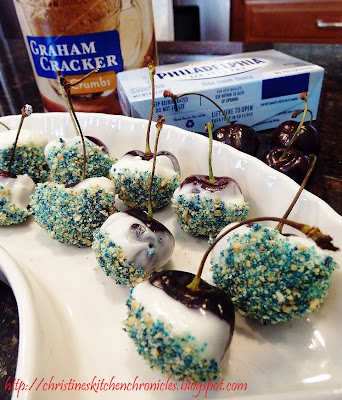
Cherry Cheesecake Bites

Today I wanted to share a simple treat that you can make for your 4th of July celebration.  It literally took me minutes to put together and is a super cute way to celebrate America's birthday.

I've had these Cherry Cheesecake Bites bookmarked for quite some time but to add to the red, white, and blue festivity, I decided to try to dye my graham cracker crumbs blue.  Not wanting them to get too wet I ended up using gel food coloring.  If you attempt it with regular food coloring please let me know how it turns out!  And of course you could make them with naturally colored graham cracker crumbs, too.

I feel like most Fourth of July desserts feature strawberries and while that would be great as well, I went with cherries.  Because is there anything more American than Cherry Pie?

Looking for more ideas Summer recipe ideas for your Independence Day Celebration?
Cherry Cheesecake Bites


Cherry Cheesecake Bites

Ingredients

  • Fresh cherries (or strawberries, raspberries, etc.), washed and dried
  • 1/2 block (4 oz) low-fat cream cheese
  • 1/2 cup powdered sugar
  • Pinch of salt
  • Graham cracker crumbs
  • Blue gel food coloring (optional)
Directions
  1. In a small food processor (love my Cuisinart Smart Stick Hand Blender for this!) or bowl with electric mixer, beat together the cream cheese, powdered sugar, and salt.  Transfer sweetened cream cheese mixture to a small bowl.
  2. In a small ziplock bag, add some graham cracker crumbs.  If desired, add a few drops of food coloring then seal bag and mix to combine.  Repeat until desired shade of color is created.  Pour prepared graham cracker crumbs into a bowl.
  3. Make sure cherries are dry then dip into the cream cheese then graham crackers.  Repeat until you've dipped them all.
  4. Eat and enjoy, taking care not to swallow the cherry pit!
Source: Barely modified from Oh, Bite It!

Friday, June 28, 2013

Chicken Parmesan Pasta

By request of Facebook fans Danielle and Ava, here's a fast and easy chicken recipe for you on this lovely Friday.

It's a meal that  your whole family will enjoy and comes together in a pinch.  To make it even easier, I used popcorn chicken rather than slicing chicken tenders.  How's that for lazy?

Coming up next week: something for 4th of July!  Some other festive recipes from years past are already listed below, too.

One Year Ago: Chorizo and Sweet Potato Lettuce Wraps, Panera Mac and Cheese, Summer Corn Fettuccine, and Pulled Hawaiian Chicken Sandwiches
Two Years Ago: Summer Strawberry Salad with Poppy Seed Vinaigrette and Herbed Potato Salad
Three Years Ago: Orange Berry Muffins and Firecracker Shrimp
Four Years Ago: Pasta Salad

Chicken Parmesan Pasta


Chicken Parmesan Pasta

Ingredients

  • 1/2 pound breaded popcorn chicken, heated 
  • 1/2 tbsp olive oil 
  • 1/2 medium onion, diced 
  • Salt and pepper to taste 
  • 4 cloves garlic, minced 
  • 1/2 jar of your favorite sauce, or equivalent of homemade 
  • Italian seasoning to taste 
  • Crushed red pepper flakes to taste
  • 4 ounces mozzarella cheese, shredded 
  • 1/2 pound penne or other short pasta

Directions

  1. Cook pasta to al dente according to packaging directions and then set aside. 
  2. Meanwhile in a large covered skillet, heat oil. Add onion and season with salt and pepper and cook until the onion is translucent and tender. Add garlic; cook and stir 30 seconds, then stir in the spaghetti sauce. Add Italian seasoning and additional salt and pepper to taste.
  3. Combine pasta, chicken pieces, sauce, and stir until everything is evenly heated. Top with mozzarella cheese, cover, and let sit over a low flame until it melts. Serve hot. 
Source: Barely Adapted from Stephanie Cooks

Monday, June 17, 2013

SRC: Brownie Pudding

It's Secret Recipe Club time yet again and this month's assignment comes from Karen at Cinnamon Freud.

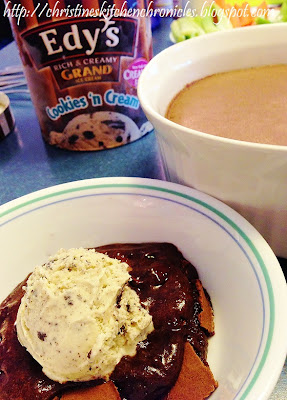
The recipe that I chose is a SERIOUS WINNER.  Not only is it really easy but it had my husband's entire family going back for seconds and wanting to lick their bowls and spoons clean.  Even I finally chose to play the "eating for two" card in order to help myself to a second serving of this decadent fudgey goodness.  It's like eating a rich molten liquid chocolate and mixed with ice cream.  Omigod!

I didn't have vanilla beans so I used more vanilla extract and took out some of the water from the recipe.  I also chose to use all regular cocoa powder instead of a mix of cocoa and dutch process cocoa as Karen suggests.  It's pretty amazing nonetheless and makes it such that any novice chef can tackle this recipe easily with items that are commonly stocked in the pantry.

This is one for the recipe box.  Thank you Karen so much for sharing!

One Year Ago: Oven Baked Sriracha Chicken and Brat Burgers with Drunken Onions
Two Years Ago: Banana and Sour Cream Pancakes
Four Years Ago: Chicken Gyros with Tzatziki Sauce

Brownie Pudding

Brownie Pudding

Ingredients

  • 1 cup butter, melted
  • 2 cups sugar
  • 4 eggs, room temperature
  • 2 teaspoons vanilla extract
  • 1 teaspoon water
  • 1/2 cup all purpose flour
  • Pinch of salt
  • 3/4 cup cocoa powder

Directions
  1. Preheat oven to 325F.  Grease a 7"x12" baking pan or casserole dish.
  2. In a large bowl, beat together sugar and eggs for 5-10 minutes, until it is thick and light yellow.  It's long mix times like these that make me super grateful for my KitchenAid stand mixer!  Beat in the vanilla extract and water.  Then add the flour, salt, and cocoa powder and beat until just combined.  Finally, add the melted butter and beat once more until combined.
  3. Pour brownie mixture into prepared pan.  Place the brownie pan inside a 9"x13" pan.  Fill the larger pan halfway up with the hottest tap water.  
  4. Bake for 50-60 minutes being careful not to over bake.  The cake is done when a cake tester or toothpick comes out 3/4 of the way done when placed 2" from the border.  
  5. Let cool slightly for 3-5 minutes then serve immediately with ice cream.
Source: Modified from Cinnamon Freud as originally from Ina Garten

Secret Recipe Club

Monday, June 3, 2013

Mascarpone Pasta with Chicken, Bacon, and Kale

I apologize for being absent lately.  May/June is always a crazy time for me between our anniversary (our 5th was this year!), my birthday, and general Summer craziness.  Add to the mix the impending arrival of our Baby Boy this year and my blogging is unpredictable to say the least.

What makes things extra interesting is that I'm still participating in a CSA share so that means fresh veggies are waiting for me to whip them into something delicious each week.  Spring is greens time and it's always a surprise as to just what kind will come in our box week to week.

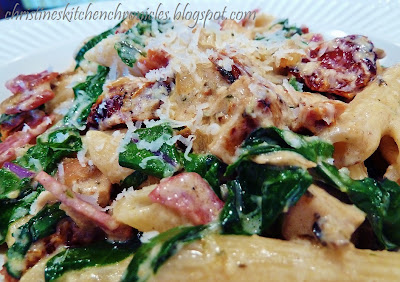
I had some leftover mascarpone cheese and so I tweaked a recipe that I found on All Recipes to include some of the gorgeous green kale that we received.  My husband isn't really a fun but when you add bacon, and chicken, and creamy cheesey pasta, he can't really complain.  Of course, if you don't have kale, you could always use spinach as in the original recipe.  This one reminded me somewhat of Macaroni Grill's Pasta Milano.

Two Years Ago: SweetFire Chicken (A Panda Express copycat and one of my husband's favorite) and Sweet Beginning's Summer Pasta Salad
Three Years Ago: Buckeyes
Four Years Ago: Quick and Easy Alfredo Sauce

Mascarpone Pasta with Chicken, Bacon, and Kale

Mascarpone Pasta with Chicken, Bacon, and Kale

Ingredients
  • 3 slices bacon 
  • 1 tablespoon olive oil 
  • 1/2 cup minced onion 
  • 1-1/2 pounds skinless, boneless chicken breast halves, cubed 
  • 1/4 teaspoon garlic powder 
  • Salt and ground black pepper to taste 
  • 2 tablespoons drained and chopped sun-dried tomatoes packed in oil 
  • 1 tablespoon prepared pesto sauce 
  • 1/4 pound fresh kale (or you can also use spinach)
  • 4 ounces mascarpone cheese 
  • 1 clove garlic, minced 
  • 1-1/2 teaspoons Dijon mustard, or more to taste 
  • 1/2 lemon, juiced 
  • 1/4 cup milk 
  • 1/4 cup grated Parmesan cheese plus additional for topping if desired 
  • 8 ounces shaped pasta such as penne, rigatoni, or farfalle. 
Directions

  1. Bring a large pot of lightly salted water to a boil. Cook pasta according to package directions to al dente.  Drain and set aside.
  2. In a large skillet over medium-high heat, cook bacon, turning occasionally, until evenly browned, about 10 minutes. Alternatively, follow the directions on the package for microwave cooking.  Drain the bacon on paper towels and crumble when cooled.
  3. In the same skillet, heat olive oil over medium heat.  Add crumbled bacon and onion and cook until the onion is translucent, about 5 minutes. Add chicken and season with garlic powder, salt, and black pepper. Cook and stir until chicken is no longer pink inside and lightly browned outside, about 10 minutes. Add sun-dried tomatoes and pesto; stir in kale and cook until wilted, stirring constantly. 
  4. In a saucepan over medium heat, mix together mascarpone cheese, 2 cloves of garlic, Dijon mustard, lemon juice, and milk. Cook until smooth and bubbling, stirring constantly, about 5 minutes; stir in 1/2 cup Parmesan cheese until cheese has melted, 2 to 3 more minutes. Pour sauce over chicken and bacon mixture. Season with additional salt and/or pepper if needed.
  5. Gently fold pasta into chicken mixture and transfer to a serving bowl. Sprinkle with additional Parmesan cheese if desired.

Source: Slightly modified from All Recipes

Friday, May 24, 2013

Recipe Swap: Peanut Butter Pudding Cookies

Today's What's Cooking Recipe Swap recipe comes from Coleen at The Redhead Baker.  While I'm familiar with her blog, I'm not sure that I've actually made anything from it before because I make far more savory recipes than sweet.  But, as you'd expect from her blog title, there were more sweet treats than not and so that's where I started with my Blogger's Choice assignment.

Even though it has peanut butter in it, for once IT WASN'T MY HUSBAND THAT PICKED THIS RECIPE!  I did.  What drew me to this particular recipe was the use of pudding in the cookie.  Many many years ago when I was in Girl Scoots (Troop #2180 represent!) I remember one of the mom's brought in a chocolate chip cookie that was the absolute softest and puffiest that I ever had.  She shared that the secret ingredient was pudding but I no longer have this recipe.  Another draw for me was the Reese's Pieces.  Friendly's clown ice cream sundaes, anyone?  And unlike Coleen, I peanut M&Ms are one of my favorites so back into the recipe they went.

The name does not do this recipe justice.  It really should be called something like Peanut Butter Candy Explosion Pudding Cookies or something because every bite is chock full of goodies.  My co-worker asked if I was trying to clear the pantry and I told her nope, just an excuse to BUY all sorts of candy ;).

It was a hit in my house but the peanut butter loving husband said that flavor was not prominent enough.  I suggested to him that next time I could use peanut butter pudding mix instead to help boost that flavor profile.  I brought some to my birthing class and it has the stamp of approval of pregnant mommies and daddies to be.  Everyone loved these so thank you Coleen (and Kate)!

Thank you also to Sarah at A Taste of Home Cooking for hosting.  Check out the blog hop to see what everyone else chose as their assignment!

Peanut Butter Pudding Cookies


Peanut Butter Pudding Cookies

Yields: About 3 dozen cookies (I got closer to 4 when using my 1.5 Tbsp cookie scoop)

Ingredients
  • ¾ cup butter, softened 
  • ½ cup creamy peanut butter 
  • ½ cup sugar 
  • ½ cup light brown sugar 
  • 2 large eggs
  • 1 tbsp honey 
  • 1 tsp vanilla extract 
  • 2 ¼ cups all-purpose flour 
  • 1 tsp baking soda 
  • ½ tsp salt 
  • 1 small box (3.4 ounces) instant vanilla pudding 
  • 1 cup chocolate chips 
  • 1 cup Peanut M&Ms 
  • 1 cup Reese’s Pieces
Directions
  1. Preheat oven to 350 degrees and line two sheet pans with parchment paper (I like to use these reusable silicone baking mats). 
  2. In a stand mixer, cream together the butter, peanut butter, sugar and brown sugar. Add in the eggs, honey and vanilla extract and beat again until incorporated. 
  3. In a separate mixing bowl, stir together the flour, baking soda, salt and pudding mix. Gradually add to the cookie dough, mixing on low speed just until incorporated. 
  4. Stir in the chocolate chips, peanut M&Ms, and Reese’s Pieces. 
  5. Drop by the tablespoonful two inches apart onto the sheet pans. (Make your life easier and cookies more uniform by investing in one of these medium sized Oxo cookie scoops!) Bake for 10 to 12 minutes. Allow the cookies to cool on the pans for 3 to 4 minutes, then remove to a cooling rack to cool completely.
Source: Kate's Recipe Box as seen on The Redhead Baker


Monday, May 20, 2013

SRC: Strawberry Cheesecake Smoothie

This month's Secret Recipe Club assignment comes from one of my favorite bloggers, Jennifer at Mother Thyme.  Jennifer had guest posted for me last year with her very popular Cream Cheese Coffee Cake.  It's always fun to get to know a new blog through SRC but sometimes, it's also good to get one you know and follow already because you just know it will be filled with great recipes!   I had already bookmarked her Strawberry Cheesecake Smoothies and so it seemed it was destiny that made her my assignment for the month.

What I loved about this recipe was how it tasted just like strawberry cheesecake filling.  With strawberries in season and having bought FOUR POUNDS from Costco, I added twice as much in my smoothies for extra strawberry oomph.  This made mine a bit thick so I had to add a splash of vanilla almond milk to thin it out.  It was awesome and so simple!

Jennifer topped hers with whipped cream and some graham cracker crumbs for the full cheesecake flavor experience.  Looks pretty, too!

Do you have any favorite strawberry recipes?

One Year Ago: Creamed Chard and Spring Onion Pasta and Fresh Strawberry Pie
Two Years Ago: Lemon-Rosemary Turkey Meatballs

Strawberry Cheesecake Smoothies

Strawberry Cheesecake Smoothies

Ingredients
  • 3/4 cup non-fat vanilla yogurt (I used 0% Fage Greek Yogurt and added about 1/2 tsp vanilla)
  • 3 ounces light or fat free cream cheese
  • 1 cup frozen strawberries
  • 1-2 teaspoons agave nectar (I used about a tablespoon of honey)
  • Vanilla almond milk or regular milk (optional)
Directions
  1. Add all ingredients except for the milk into a blender.  Process until smooth and creamy.  If needed, add milk of choice to thin the smoothie out to your desired consistency.  Serve immediately.
Source: Modified from Mother Thyme

Secret Recipe Club